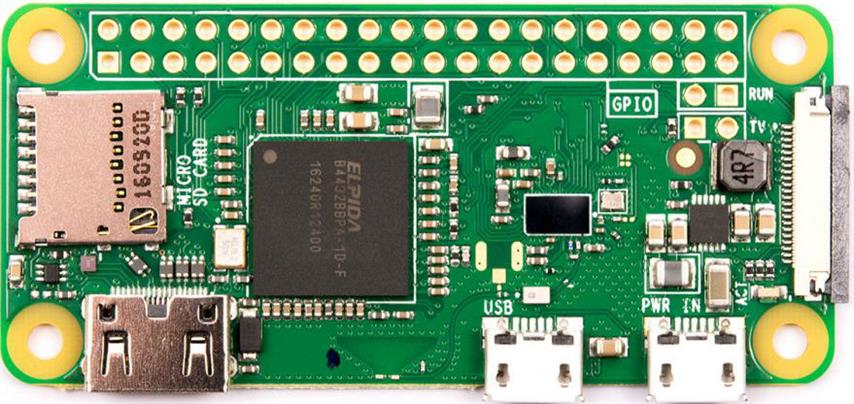
WordPress On A Pi Zero W

Hosting a WordPress website from home on a Raspberry Pi Zero.

This guide doesn't cover building your website content but gives you the platform and tools to host it.

Hardware:

Raspberry Pi Zero W
Micro USB cable
Micro SD card 16GB class 10
SD Card Reader
USB Power supply (A spare charger would do)

It is useful to buy the complete starter kit when you purchase a Pi Zero but it is not required for this project as the Pi Zero will be set up to run headless.

Software:

Raspberry Pi image
Win32DiskImager
SD Card Formatter
Putty
Notepad++

The first thing we need is the raspian image, download it from here (Choose the lite version).
Then we will need Win32DiskImager to write the image to SD card, download here and install.
Download SD Memory Card Formatter from here and install.
We will be using Putty to ssh into the Pi.  Putty can be downloaded here.
Finally download and install Notepad++ from here .  This is required to write files that can be read properly by the Linux operating system.

Note:  The SD card was set up and imaged on a  Windows PC.  It also assumes that the reader has a basic understanding of the windows operating system.  To do so on Mac or Linux should be straight forward. The rest of this guide is virtually independent of OS.

Pi Zero W

Imaging and modifying SD Card.

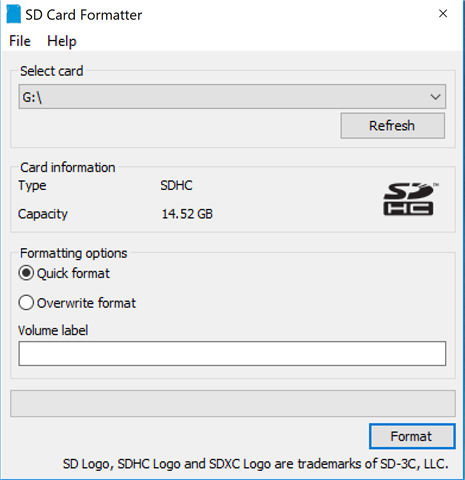
Run the SD Memory Card Formatter.  Then make sure the card is selected in the Select card box and click Format.

Once complete close SD Memory Card Formatter and run Win32DiskImager.

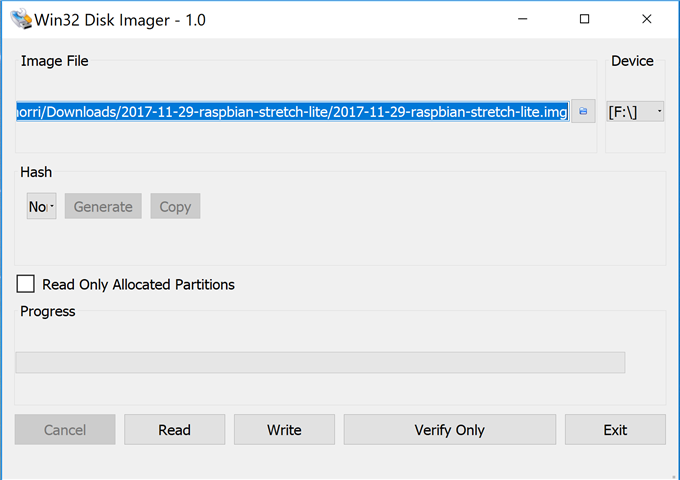
In Win32 Disk imager, ensure the correct device is selected and browse to and select the raspbian image file then click 'Write'
The image will complete in a few minutes.
Close the Disk imager.

We now need to create a file to automatically configure the Wi-Fi settings.
Open Notepad++ then select Edit>EOL Conversion>Unix(LF)

Copy the following into the Blank file changing the country, ssid and psk to match your Wi-Fi settings.
If your not sure what your country setting (alpha-2 code) is, you can check here.

country=XX
update_config=1
ctrl_interface=/var/run/wpa_supplicant network={
scan_ssid=1
ssid="SSID"
psk="password"
}

Save the file to the SD card with the file name wpa_supplicant.conf

We now need to tell the Pi to enable ssh so we can communicate with it.  To do this create an empty text file called ssh and save it to the SD card then rename the file by removing the .txt extension.

The SD card is now ready to boot the Pi.  Safely remove the card from the PC.  Put the SD card into the Pi Zero, connect the USB cable to the port marked PWR and plug in to USB port or charger to power it.  Leave it for a few minutes to boot and configure.

We need to know the devices local IP address.  You can find this by logging into your router and finding the list of connected devices.  Make a note of this and add it to your computers Hosts file.  To do this run notepad as administrator, select all files and open C:\Windows\System32\drivers\etc\hosts

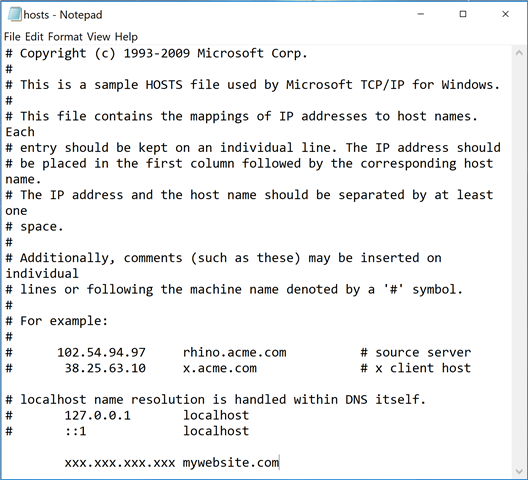
At the bottom of the file add the Pi's IP address and website name as above but change the xxx.xxx.xxx.xxx to the found IP address and mywebsite.com to whatever name you are given your website.  If you intend to publish this site on the internet first ensure that the website name (domain) is available.

Preparing the Pi.

If all has gone well we are now ready to create the webserver.  The type of server we are going to create is a LEMP server stack i.e. Linux operating system, Nginx webserver, MySQL database and PHP.  We will be using MariaDB which is a community-developed fork of the MySQL.

Launch Putty and enter the IP address (or website name) of the PI and click open.  Select yes to the warning message that appears the first time it's accessed.  Login as the user 'pi' and the default password 'raspberry'

We need to set a more secure password, do this by typing 'passwd' at the command prompt and then enter.  Follow the prompts to create new password.

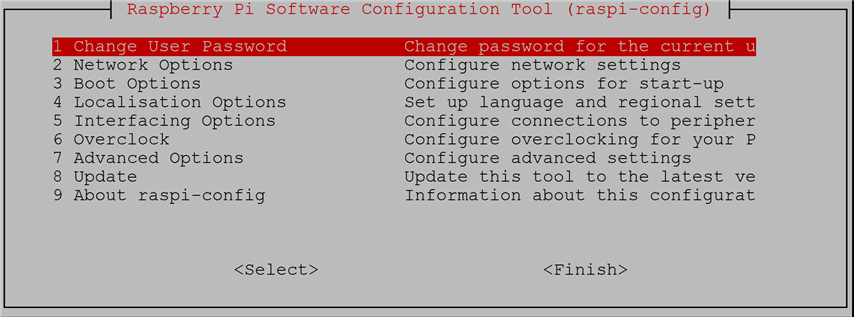
To configure the Pi run raspi-config, select Localisation Options and set the locale, timezone and keyboard layout to match your location.

sudo raspi-config


Next we need to update the Pi, do this by entering the following.

sudo apt-get update && sudo apt-get upgrade


This will take several minutes to complete.  Once completed reboot the Pi using the following command.


sudo reboot now


After reboot, reconnect in Putty.  We are now ready to install and configure the web server.  Start by installing nginx.


sudo apt-get install nginx -y


Then MariaDB.


sudo apt-get install mariadb-server mariadb-client -y


Then PHP.


sudo apt-get install php7.0 php7.0-fpm php7.0-mysql -y


And finally WordPress.  Add each line separately and press enter but change 'mywebsite' to whatever you are calling your website.


cd /var/www
sudo wget https://wordpress.org/latest.tar.gz
sudo tar xvfz latest.tar.gz
sudo rm latest.tar.gz
sudo mv wordpress mywebsite

Give ownership of your 'mywebsite' folder and contents to www-data.

sudo chown -R www-data:www-data /var/www/mywebsite


Make the Pi user a member of the www-data group


sudo adduser pi www-data


We need to create a configuration file for the webserver do this by entering the following but using your website name.


sudo nano /etc/nginx/sites-enabled/mywebsite.conf


This opens a new blank file. Copy the following code into the file and change the website name to match yours in the three places indicated.


# WordPress single site rules.
# Designed to be included in any server {} block.
# Upstream to abstract backend connection(s) for php
upstream php {
server unix:/run/php/php7.0-fpm.sock;
}

server {
listen 80;
## Your website name goes here.
server_name mywebsite.com www.mywebsite.com;
## Your only path reference.
root /var/www/mywebsite;
## This should be in your http block and if it is, it's not needed here.
index index.php;

location = /favicon.ico {
log_not_found off;
access_log off;
}

location = /robots.txt {
allow all;
log_not_found off;
access_log off;
}

location / {
# This is cool because no php is touched for static content.
# include the "?$args" part so non-default permalinks doesn't break when using query string
try_files $uri $uri/ /index.php?$args;
}

location ~ \.php$ {
#NOTE: You should have "cgi.fix_pathinfo = 0;" in php.ini
include fastcgi.conf;
fastcgi_intercept_errors on;
fastcgi_pass php;
fastcgi_buffers 16 16k;
fastcgi_buffer_size 32k;
}

location ~* \.(js|css|png|jpg|jpeg|gif|ico)$ {
expires max;
log_not_found off;
}
}


Save the file by pressing ctrl x > y > Enter.


Setting up the Database:


Enter the following command.


sudo mariadb


 At the database prompt enter the following to create the database.


CREATE DATABASE mywebsiteDb;


 Then create the user and privileges using your own details shown in red.


CREATE USER 'mywebsiteuser'@'localhost' IDENTIFIED BY 'password';
GRANT ALL ON mywebsiteDb.* TO 'mywebsiteuser'@'localhost';
exit


We need to make a change to the PHP.ini file to fix a path problem.  So open the PHP.ini with the following command.


sudo nano/etc/php/7.0/fpm/php.ini


Use the arrow keys to locate the line  ;cgi.fix_pathinfo =1 and change it to cgi.fix_pathinfo=0;
While in this file it is a good idea to change the maximum file upload size.  Do this by changing the following values


upload_max_filesize = 64M
post_max_size = 64M
max_execution_time = 500


Save the file by pressing ctrl x > y > Enter.


We now need to rename the WordPress configuration file.  Enter the following command, changing the red to match your setup and press enter.


sudo mv /var/www/mywebsite/wp-config-sample.php /var/www/mywebsite/wp-config.php


 We now need to edit the file.


sudo nano /var/www/mywebsite/wp-config.php


Change the file to match the info you used to create the database.
The highlighted text at the end of the file are WordPress security keys.  New random security keys can be generated here and simply pasted into the file.


// ** MySQL settings - You can get this info from your web host ** //
/** The name of the database for WordPress */
define('DB_NAME', 'mywebsiteDb');

/** MySQL database username */
define('DB_USER', 'mywesiteuseruser');

/** MySQL database password */
define('DB_PASSWORD', 'password');

/** MySQL hostname */
define('DB_HOST', 'localhost');

/** Database Charset to use in creating database tables. */
define('DB_CHARSET', 'utf8');

/** The Database Collate type. Don't change this if in doubt. */
define('DB_COLLATE', '');

/**#@+
* Authentication Unique Keys and Salts.
*
* Change these to different unique phrases!
* You can generate these using the {@link https://api.wordpress.org/secret-key/1.1/salt/ WordPress.org secret-key service}
* You can change these at any point in time to invalidate all existing cookies. This will force all users to have to log in again.
*
* @since 2.6.0
*/
define('AUTH_KEY', 'put your unique phrase here');
define('SECURE_AUTH_KEY', 'put your unique phrase here');
define('LOGGED_IN_KEY', 'put your unique phrase here');
define('NONCE_KEY', 'put your unique phrase here');
define('AUTH_SALT', 'put your unique phrase here');
define('SECURE_AUTH_SALT', 'put your unique phrase here');
define('LOGGED_IN_SALT', 'put your unique phrase here');
define('NONCE_SALT', 'put your unique phrase here');
/**#@-*/


Save the file by pressing ctrl x > y > Enter.


Lets ensure nginx is configured properly by running the following command.


sudo systemctl restart nginx.service


I got an error at this stage and had to make a change to server_names_hash_bucket_size in the nginx.conf file


sudo nano /etc/nginx/nginx.conf


I changed  '# ;server_names_hash_bucket_size 32;' to read  'server_names_hash_bucket_size 64;' by removing the # ; and changing the value.


If all is well reboot the Pi


sudo reboot now


WordPress should now set up on your Raspberry Pi Zero.
To access it,  type your website url into a browser and you should then be presented with the WordPress setup page.


At the moment the site can only be accessed from inside your network from a computer that has the websites url and IP address in its hosts file.  But its all ready for you to create your own website.


To publish online you will need to:
Register your domain.
Open ports on your router.
Have a static public address or Dynamic DNS configured.
 
All this info can be found on the internet and it may look a bit daunting at first but its not to difficult.


It still amazes me that a website can be created wholly on a such a tiny PCB .  By default it may not be the most secure website in the world but it works and works well, indeed this guide and the rest of this website is running on it.


Note: I have since hardened the security on the site which I may document in future.
It has been while since I completed this project. I had moved it to a Raspberry Pi 4 but the website it is now hosted on the internet.


If you have any problems or questions or you have indeed completed this build please comment below.


Leave a Reply

Your email address will not be published. Required fields are marked *